Mechanical Rigging Overview
Rigging Animation Mechanical


In recent years, there have been huge advancements and changes to how I rig mechanical objects. If one knows what they're doing, the rigging system in Blender can achieve almost any level of control that one desires. For those that do not know what rigging is, it is the process of setting up the controls and kinematics for objects in a scene to prepare them for animation. Technically, anything could be animated without having to perform rigging. However, complicated objects or characters need rigs if they're to be animated in any practical way. In this post, I wish to focus solely on the rigging of mechanical or hard-surface objects. It was quite a journey to develop the process from scratch, and my more recent programming abilities have made it much easier to get the controls wanted without tedious and repetitive work.
Initial Experience
When I first approached mechanical rigging about 5 years ago, It was quite daunting. In Blender, they have specific objects called "Armatures" that you place controllers in called "Bones" (other software like Maya may refer to them as joints). However, I was not sure how to really make those myself without add-ons at this point (I had been using an addon known as Rigify to create rigs for characters).
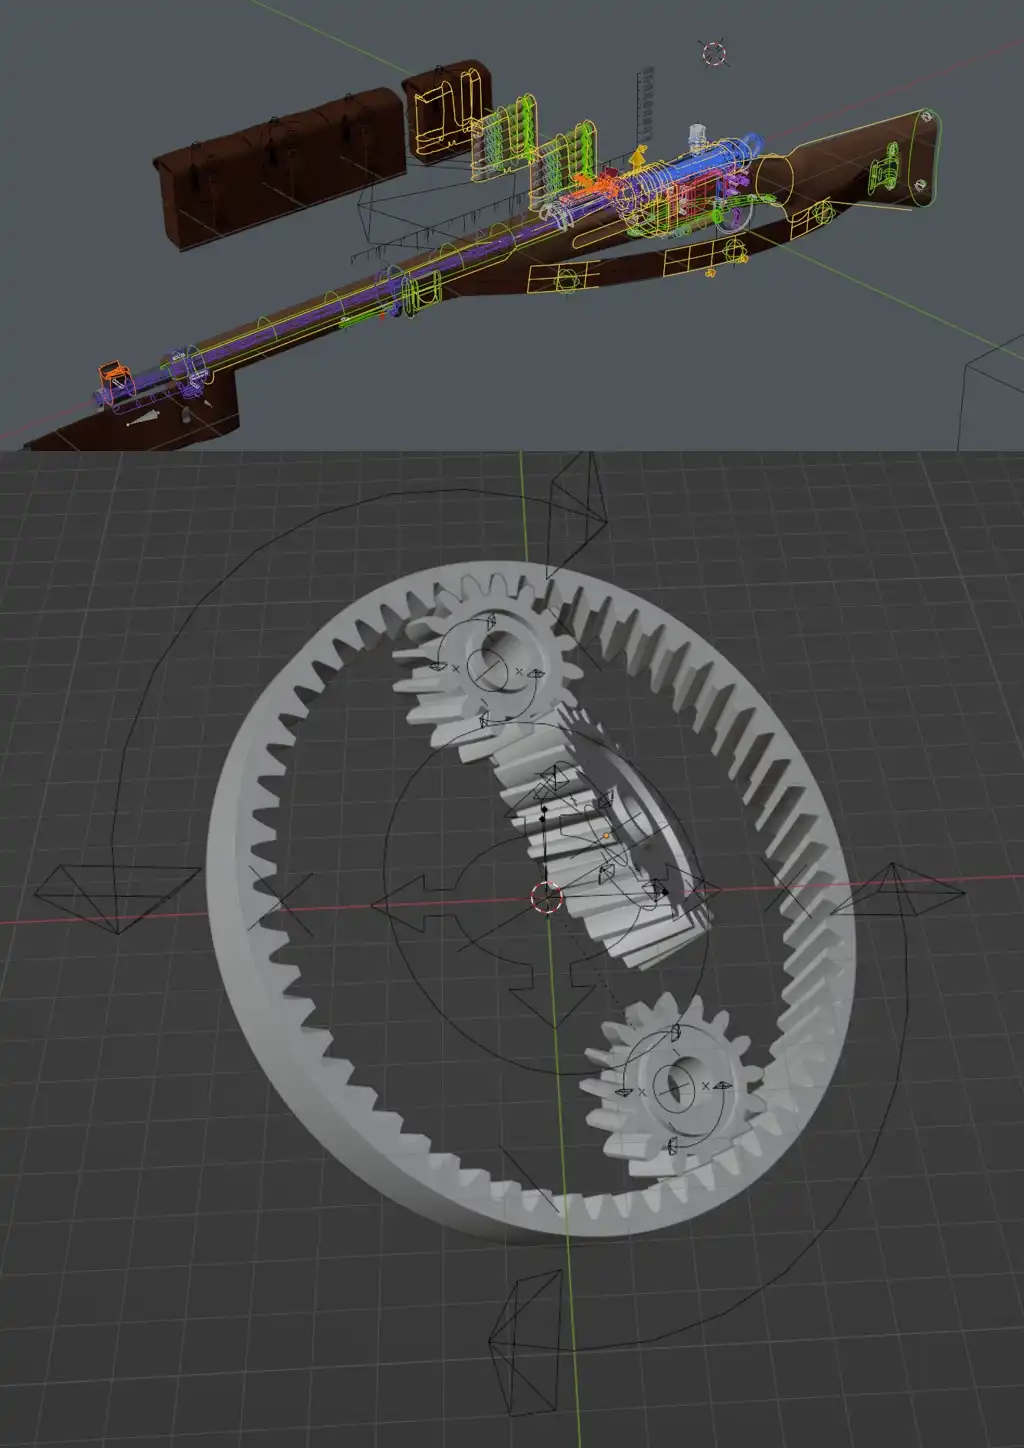
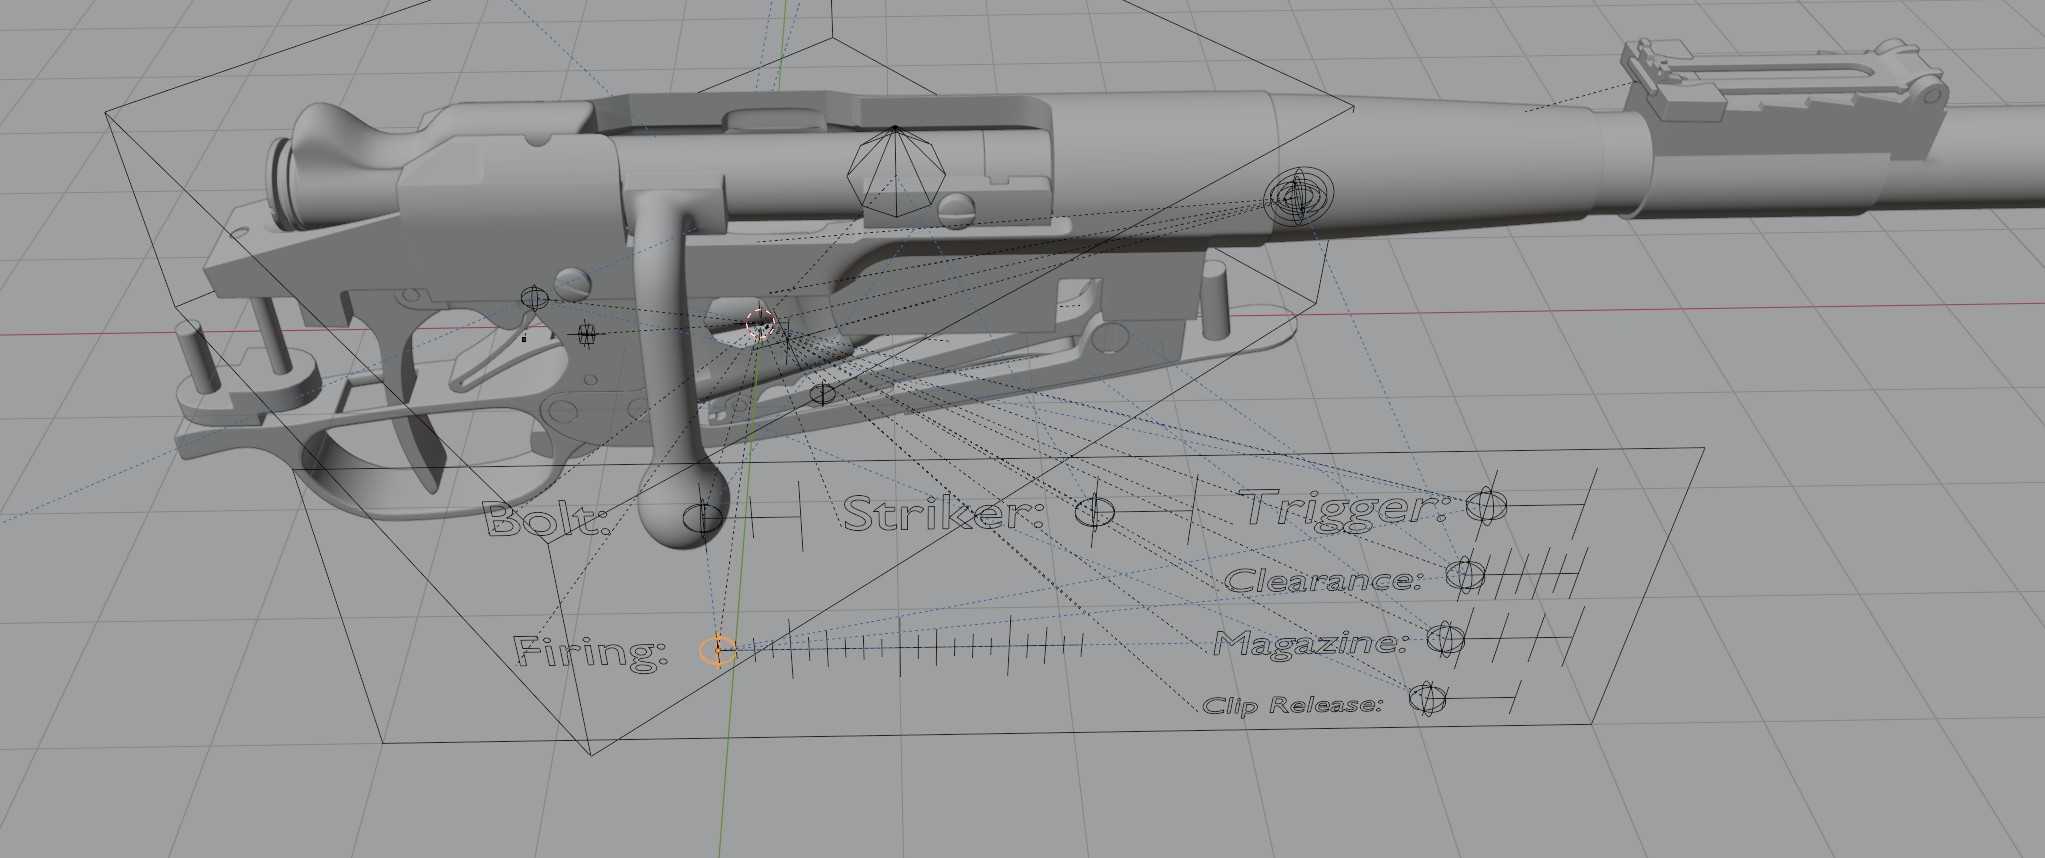
You could technically get simlar levels of control by using constraints available for objects. Since I couldn't necessarily link all constraints to objects that were available in the scene to begin with, I added reference objects known as "empty" objects and linked all my constraints to those. While I eventually realized how un-ideal this was, it accomplished what I wanted at that time. In this example, I have a digital recreation of an old French Berthier carbine's mechanism. For controllers, I have a bunch of empty-object controllers that work basically as sliders. There are low-level controllers that control one specific part of the mechanism like the trigger or the striker. Then, there's higher level controls that control many of these features at once. The "Firing" control will cycle the bolt and even chamber rounds from the magazine. While these controls were useful, there were other aspects that this system was lacking. One specific feature outside of this particular control scheme was the ejection of spent casings. To create that motion, I leveraged Blender's rigid-body physics system. The control for going between the animated path and one that was simulated through its inherited momentum had to be toggled manually and separately from the previous controller scheme I described. However, it was still possible to put together an animation that demonstrated this stripped mechanism.

While it worked to quickly and easily achieve the repeating motions of the carbine, it had some serious drawbacks. For one, all the controllers are separate objects, and keeping track of them individually would become more difficult as more controls became involved. Secondly, Blender has a way to store animations as "actions". Multiple actions could be saved to have sets of pre-made motion ready to use. However, the motions within an action can only be saved for a single object. If I have motions or keyframes that I wish to store between two different objects, there would have to be two separate actions corresponding to each respective object. Que more frustration in trying to keep track of multiple actions long-term.
The resulting "rig" if you could call it that was quite clunky and would have some future-use problems. Still, the experience with this helped me to understand the logic involved with constraining objects motions, and that is the core of rigging in general. Still, there was much more to learn from this point going forward.
Mechanical Armatures
This article is in progress. Come back later for when more details about this rigging adventure are added!